The Battle of Installation 04
was the name given to a series of skirmishes between the UNSC and the Covenant on the surface of the Forerunner construct Installation 04.[1]
The Flood and the Forerunner Sentinels joined the battle during its later part.
Space Battle
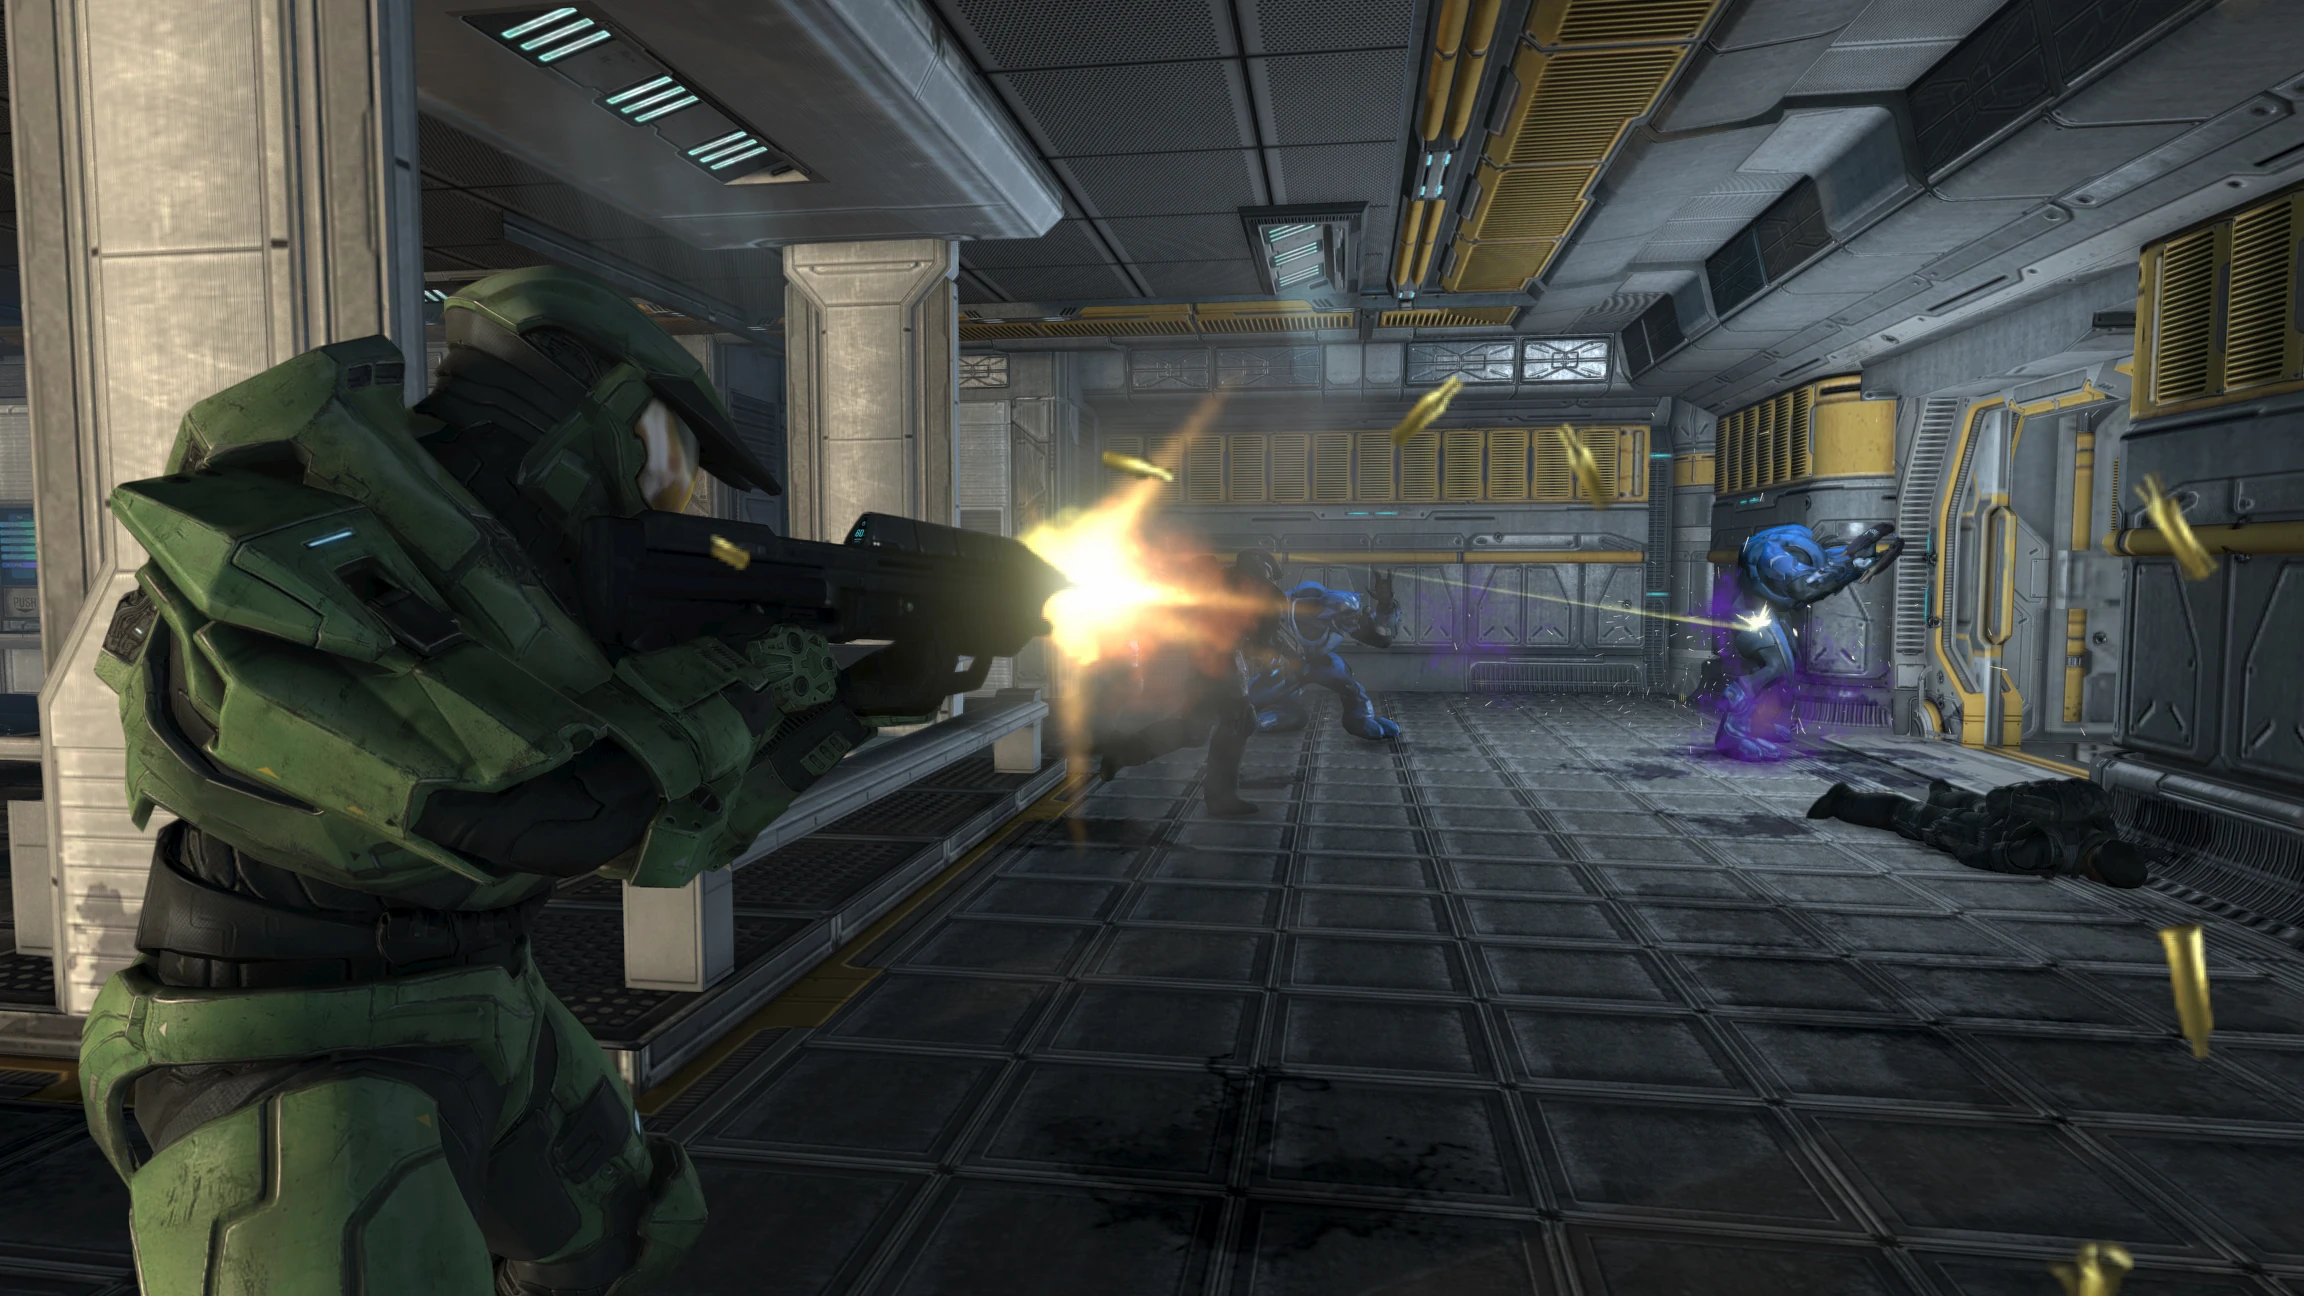
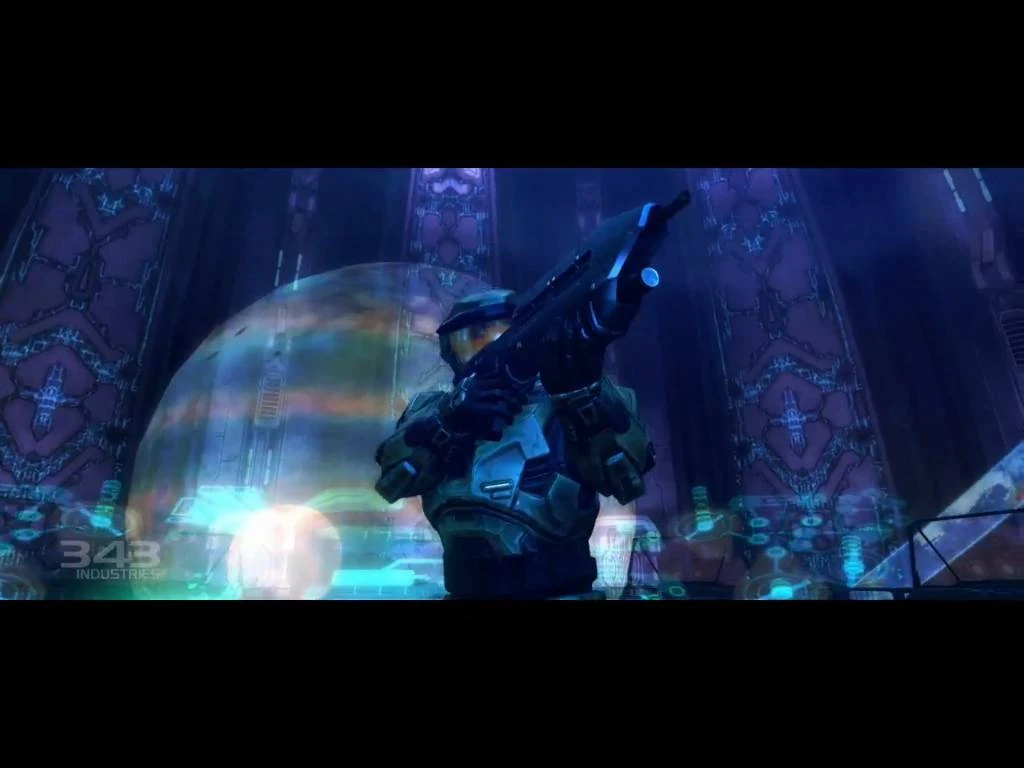
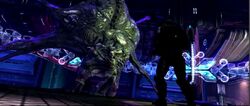
Master Chief firing on a Sangheili Minor.
Following the UNSC's disastrous defeat at Reach and the loss of a third of her tech staff, the UNSC Pillar of Autumn made an apparently blind jump through Slipspace from where they would then make their way to Earth. In reality it was planned by the AI Cortana, using coordinates found in an artifact found on Sigma Octanus IV. The Autumn and the approximately 1,100 humans on it were followed and upon arriving in orbit above the planet Threshold on September 19, 2552, were intercepted by the pursuing Covenant vessels which had arrived before it.
The Autumn managed to destroy four of the Covenant vessels and forced one, the Truth and Reconciliation to retreat for repairs. As Covenant forces began boarding the ship, Captain Jacob Keyes ordered Thom Shephard to release Master Chief Petty Officer John-117 from his Cryo-chamber. Shephard was later killed by a conduit explosion. His friend, Sam Marcus, was working in the observation tower overlooking the Cryo-chamber when he was killed by a Sangheili Major.[2]
John-117 then proceeded to the Bridge of the Pillar of Autumn, where he was joined with the shipboard AI Cortana. After the MAC cannon was disabled due to an anti-matter charge, Keyes initiated Cole Protocol Article 2, and evacuated the ship. Carrying Cortana, John fought his way through the rapidly decaying Pillar of Autumn. He then evacuated to the recently discovered Installation 04 aboard the Bumblebee lifepod Lima Foxtrot Alpha 43.[3] The pod's descent systems failed in mid-flight and the following impact killed all of the marines on board, except for John-117.[4]
The dropship pilots, led by Foe Hammer, decided to take their Pelicans down instead of going down in the lifeboats. After dealing with a few Covenant hostiles, they successfully reached their ships and escaped the Pillar of Autumn on them.[5]
Captain Keyes flew the Autumn most of the way to the ring manually and then abandoned the ship to crash on Halo, leaving it under the control of some subroutines Cortana left behind for that very purpose. Unknown to him and his bridge crew, they were followed by a cloaked Sangheili that planned to capture him, but Keyes detected the Sangheili on the way down and killed it personally by pulling a corporal's pistol out of his holster and firing on sight, leaving every bridge crew member in the pod speechless.[6] The rest of the Covenant boarders abandoned the Pillar of Autumn as it went down. The ship crash landed in a desert on Halo mostly in one piece but was damaged beyond repair and with no hope of ever taking off again.[7]
Ground Engagement
Seizure of Alpha Base
Meanwhile, a battalion of ODSTs and Marines led by Major Antonio Silva and Lieutenant Melissa McKay "helljumped" to Halo in their Human Entry Vehicles. Once on the ground, the ODSTs made contact with Major Silva and established a temporary headquarters. Silva then instructed McKay to capture a Covenant-held butte that Silva's AI had projected during his descent. The rest of the battalion stayed at the headquarters' established landing zones, allowing Pelican Dropships to pick up troops for the aerial assault on the butte. The Covenant then staged an assault on the Helljumpers, sending hundreds Ghosts and later, Banshees. The marines fended off the attack, killing more than 50 Sangheili, including a Zealot, but suffered twenty-three killed and sixteen wounded. McKay lost only one Marine, while the fourth company lost a few more performing an aerial assault on the butte.
Under orders from Major Silva, Melissa McKay led her team of ODSTs in an assault on Alpha Base. They fought their way up a ramp spiraling up the butte, while the Covenant attempted to eliminate the humans by raining plasma grenades on them. Meanwhile, Silva began loading troops onto the Pelicans for an aerial insertion onto the butte, halted briefly by the Covenant attack.
After fighting their way up the butte, McKay's team was halted by a rockfall. However, a door set into the side of the butte allowed access, and McKay used a rocket launcher to detonate a large number of Covenant explosives, wiping out any Covenant inside. Once inside, they rode a lift up to the surface, where they found that Silva had arrived and had eliminated the remaining Covenant.[8]
Betrayal
Upon arrival on the ring, Captain Jacob Keyes, a marine fire team led by Corporal Wilkins and the surviving command crew were able to fend off Covenant troops, who were attempting to capture them. However, one officer, Ensign Ellen Dowski was beginning to crack, and wanted to surrender to the Covenant. Believing that she might stir up similar thoughts in the marine fire team, the team tied her up and left her to surrender to the Covenant herself. However, upon discovering that the gulch they landed in was a box canyon the humans were captured and executed by the Covenant, save for Captain Keyes, who was taken for interrogation.[9]
Rescue of Stranded Survivors

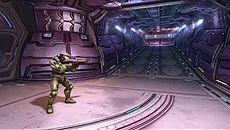
John-117 shortly after landing on Halo's surface.
After crash-landing on the ring, John-117 found that he and Cortana were the only survivors of his life pod. John headed out to get away from Covenant patrols, and after a brief skirmish with one of the small Covenant patrol, he found a group of survivors under attack in a nearby structure. John killed off the Covenant attackers and helped the survivors, including Sergeant Johnson, fend off three more waves of Covenant forces before Echo 419 Foe Hammer finally arrived to pick them up. Witnessing three more lifepods flying overhead, Cortana had Foe Hammer disengage her Warthog for John to find the survivors. He was joined by two Marines who manned the gun and passenger seat.
After making his way through an underground forerunner structure and another brief skirmish with Covenant forces, John found another lifepod abandoned and with no sign of survivors or bodies. However in the nearby forerunner structure at the of a cliff, John-117 found the missing survivors under attack by Covenant. After clearing out the structure, Echo 419 went to picked up the survivors.
After an encounter with two Covenant Banshees, John-117 found another group of survivors at the top of a hill fending off Covenant attackers. With the help of John-117, the marines killed off the Covenant forces, including those that were dropped off by another Spirit Dropship. After the fight, Echo 419 managed to land her Pelican and to pick up the survivors.
John located the last group of marines hiding in a rock formation and helped them fend off several waves of Covenant forces. With the area secured, Echo 419 picked up the marines as well as John. At the same time, Cortana, having hacked into the Covenant Battlenet, discovered that Captain Keyes was alive but had been captured by the Covenant. Chief and the survivors returned to Alpha Base to plan a rescue mission for the captain.[10][11]
Raids on the Truth and Reconciliation
John-117 inside the Truth and Reconciliation
- Main article: Raids on the Truth and Reconciliation
The UNSC launched a mission to recover their captured leader, Keyes, who was being held aboard the CCS-class Battlecruiser the Truth and Reconciliation. Under the cover of night, Master Chief and a squad of ODSTs boarded the ship via its gravity lift. After fighting through the maze-like corridors, the team captured the ship's command center. The ODSTs stayed behind while Master Chief went ahead and freed Captain Keyes and several other Marines. When they returned to the bridge, however, they found that the ODSTs had been slaughtered by Stealth Elites. Furthermore, Echo 419 was under attack from Covenant air patrols and was unable to pick them up. In order to escape, John and Keyes hijacked a Covenant dropship and used it to return to Alpha Base.[12][13]
Battle of the Silent Cartographer
- Main article: Battle of the Silent Cartographer
The following day, a Marine assault group lead by John-117 launched an attack on the Silent Cartographer island in their attempt to uncover the location of the ring's Control Room. Fighting their way through the heavily defended Covenant positions, John-117 and a handful of Marines, supported by Echo 419 and Bravo 22, discovered the location of Alpha-Halo's Control Room. However, a pair of Covenant Dropships landed and engaged the marines defending the LZ killing most of the Marine assault group.[14][15]
Flood Containment Facility

Meanwhile, a team of Marines led by Captain Keyes landed nearby in Pelican dropship Victor 933 and proceeded to infiltrate a Forerunner structure in a swamp, which they had been revealed by the captured Elite 'Qualomee that it was a weapons cache. They later met up with Staff Sergeant Avery Johnson's "Fire Team Charlie", and engaged the small Covenant forces throughout the upper levels of the facility. As the teams of Marines made their way towards the lower levels, they noticed dead covenant that had been killed by neither friendly fire nor the Marines.
While exploring the lower levels, the UNSC forces eventually came across a sealed door, locked down by the Covenant. With increasing curiosity the UNSC opened the door and explored the room. After a short time, the "weapons cache" Keyes was looking for revealed itself in the form of the Flood. The Covenant had sealed the facility after they had unwittingly released the monstrous parasite. The Flood attacked the members of 2nd squad who barely got a message to Keyes before being consumed by the Flood. However, the message was too late as the Flood attacked Keyes and Sgt. Johnson's Fire Team, infecting Keyes along with Privates Riley, Kappus, Jenkins, Mendoza, Bisenti, and about 3 others. Due to Sergeant Johnson's Boren's Syndrome, the Flood couldn't infect him. He managed to escape from the Flood and eventually make his way out of the facility. Another marine, who was eventually found by John, also survived from the Flood by playing dead.[16]
Battle of Alpha Base
- Main article: Battle of Alpha Base
The UNSC forces, led by Lieutenant McKay, staged a raid on the crashed Pillar of Autumn, in order to gain extra supplies of rations, weapons, ammunition, and fuel. They succeeded in destroying a large force of Covenant including several Ghosts, a Spirit dropship, and many Covenant troops. The assault group successfully retrieved a large squad of Warthogs, trailers and four Scorpion tanks from the cruiser's vehicle bays and drove them in a convoy to Alpha Base. At a trio of hills, the Covenant attempted to ambush the humans with a strong force of Wraith mortar tanks, Banshees and Ghosts. Despite the size of the attack, The Covenant forces only managed to inflict moderate damage before losing the tanks and a large portion of their ground forces to the Scorpions' return fire.
Meanwhile, the Covenant sent the captured Pelican Charlie 217 and its captured pilot Lt. Rick Hale to Alpha Base in order to insert 30 Spec Ops Elites commanded by Zuka 'Zamamee to assassinate the (absent) Master Chief and clear a landing zone for six Spirit Dropships. Although six of the Elites managed to enter the base, the rest were killed when the ODSTs flooded Charlie 217 with jet fuel before igniting it, killing all of the Elites on the platform. The surviving Covenant Spec Ops Elites had by this time neutralized the human control rooms and liberated a large number of Covenant prisoners.
The MLA auto-cannons and various other defense systems managed to destroy one of the Spirit dropships and killed many of the Covenant troops in the others. Several Marines armed with Rocket Launchers inflicted additional casualties. Despite their numerical superiority, the Covenant forces landing on the butte were soon either killed or captured, and the assault on Alpha Base stalled.
Meanwhile, the Covenant ground assault, lead by a Zealot Field Master Noga 'Putumee, made significant progress against the humans due to their use of Spirit dropships clearing the way ahead of the ground forces. However, the rout was designed to lure the Covenant into the firing range of a pair of concealed Scorpion main battle tanks, which tore into the ranks of the aliens and inflicted major casualties. Field Master 'Putumee was killed by the third shot from the tanks, throwing the alien forces into chaos, and of the 150 infantry with him, only a few survived to retreat.
Back at Alpha Base, the Covenant Spec Ops team and the freed Covenant troops ran into a Marine ambush in which all members of both sides were killed other than the Elite Zuka 'Zamamee and the Grunt Yayap. By this time, however, the Covenant ground assault was in full retreat. Zuka 'Zamamee and the grunt Yayap were the only known Covenant survivors. They later fled the battle in a recaptured Banshee.[17]
Assault on the Control Room
- Main article: Assault on the Control Room

Meanwhile, John-117 was inserted into a network of tunnels by Foe Hammer. After fighting his way through, he received a radio transmission from Fire Team Zulu, who were pinned down in a valley. John-117 rushed to assist, fighting his way across a bridge to an elevator, which he rode down to the floor of a canyon. With Warthog and later a Scorpion Main Battle Tank, John and the Marines fought through a system of adjacent canyons. Leaving Fire Team Zulu for evac, John continued to make his progress towards the Control Room. Upon reaching the room, Cortana accessed Halo's systems and discovered a horrible secret buried in the ring, and that Captain Keyes had walked right into it.[18][19][20]
Encountering the Flood and 343 Guilty Spark
- Main article: Battle of the Containment Facility

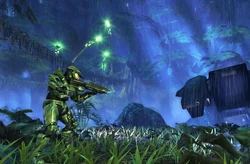
Three hours after the assault on the Control Room, John-117 arrived near Victor 933's crash site on board Echo 419. As John made his way through the facility, he found the place to be in ruins: security doors had been broken and wrecked parts of the facility were in flames. The only resistance that John encountered was from a few groups of terrorized Grunts and Jackals. After entering one of the Containment Room, John found the remains of one of the marine squads including Private Jenkins' helmet with a built in video camera. After seeing the gruesome events through the eyes of Jenkins, John was attacked by the Flood spewing out of the nearby doors. John-117 fought them off and then proceeded to escape the facility, combating Infection and Combat forms. John-117 soon caught up with Corporal Lovik's squad and was advised by Echo-419 to take refuge at a nearby tower for pick up.
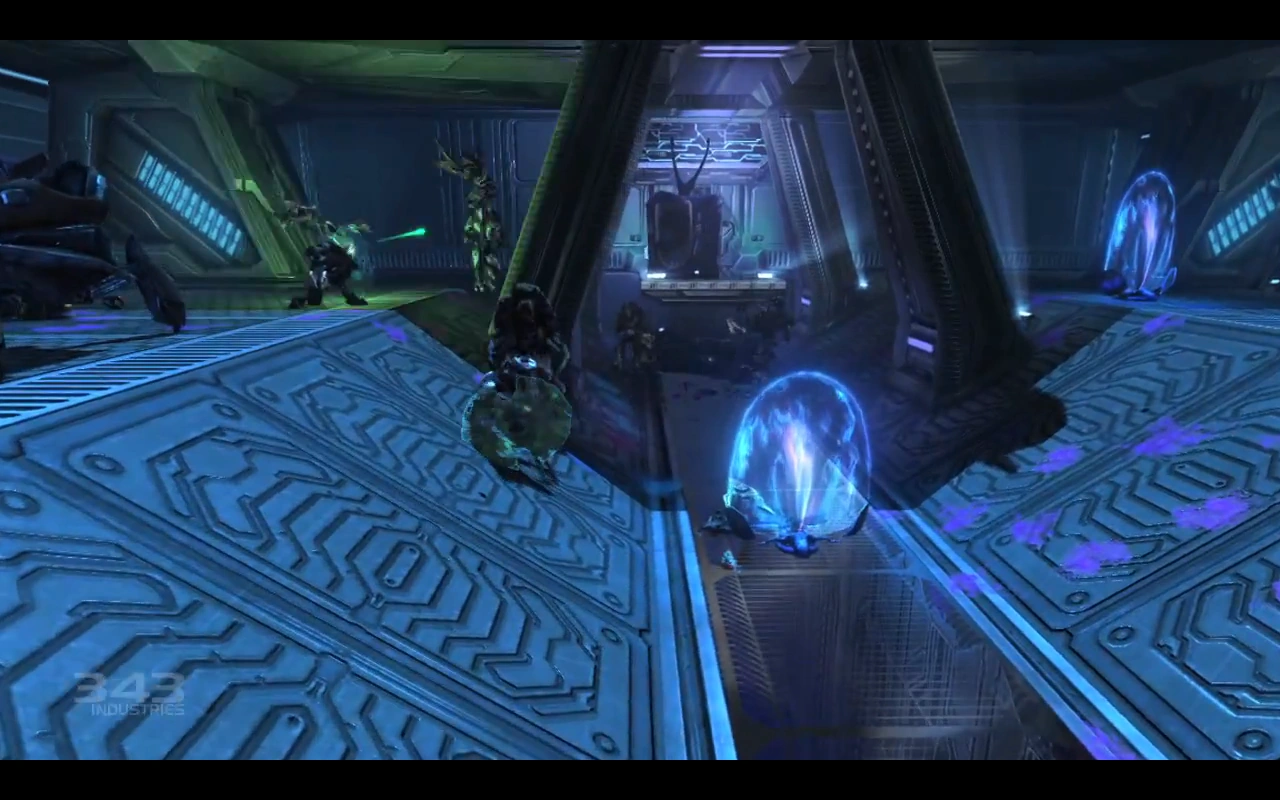
As the group made its way through the swamp towards the tower, large swarms of Flood attacked them. After making it to the structure, John and the other survivors, were aided by a mysterious floating constructs known as Sentinels. The Sentinels, commanded by a Monitor, 343 Guilty Spark, defended John and eliminated any Flood in the vicinity of the tower. The Monitor then teleported John-117 into the Library, referring to him as "Reclaimer".[21][22]
Covenant forces from a crashed Spirit dropship fled the Containment facility, but were all wiped out.
Sentinels began to wipe out the Flood forces in the vicinity of the swamp area. However, the majority of Flood forces escaped the Containment facility and began to spread across the Installation, infecting any appropriate hosts. Captain Keyes was later taken to the Truth and Reconciliation by the Flood.
Infinite Succor Incident
- Main article: The Last Voyage of the Infinite Succor
Capture of the Infinite Succor


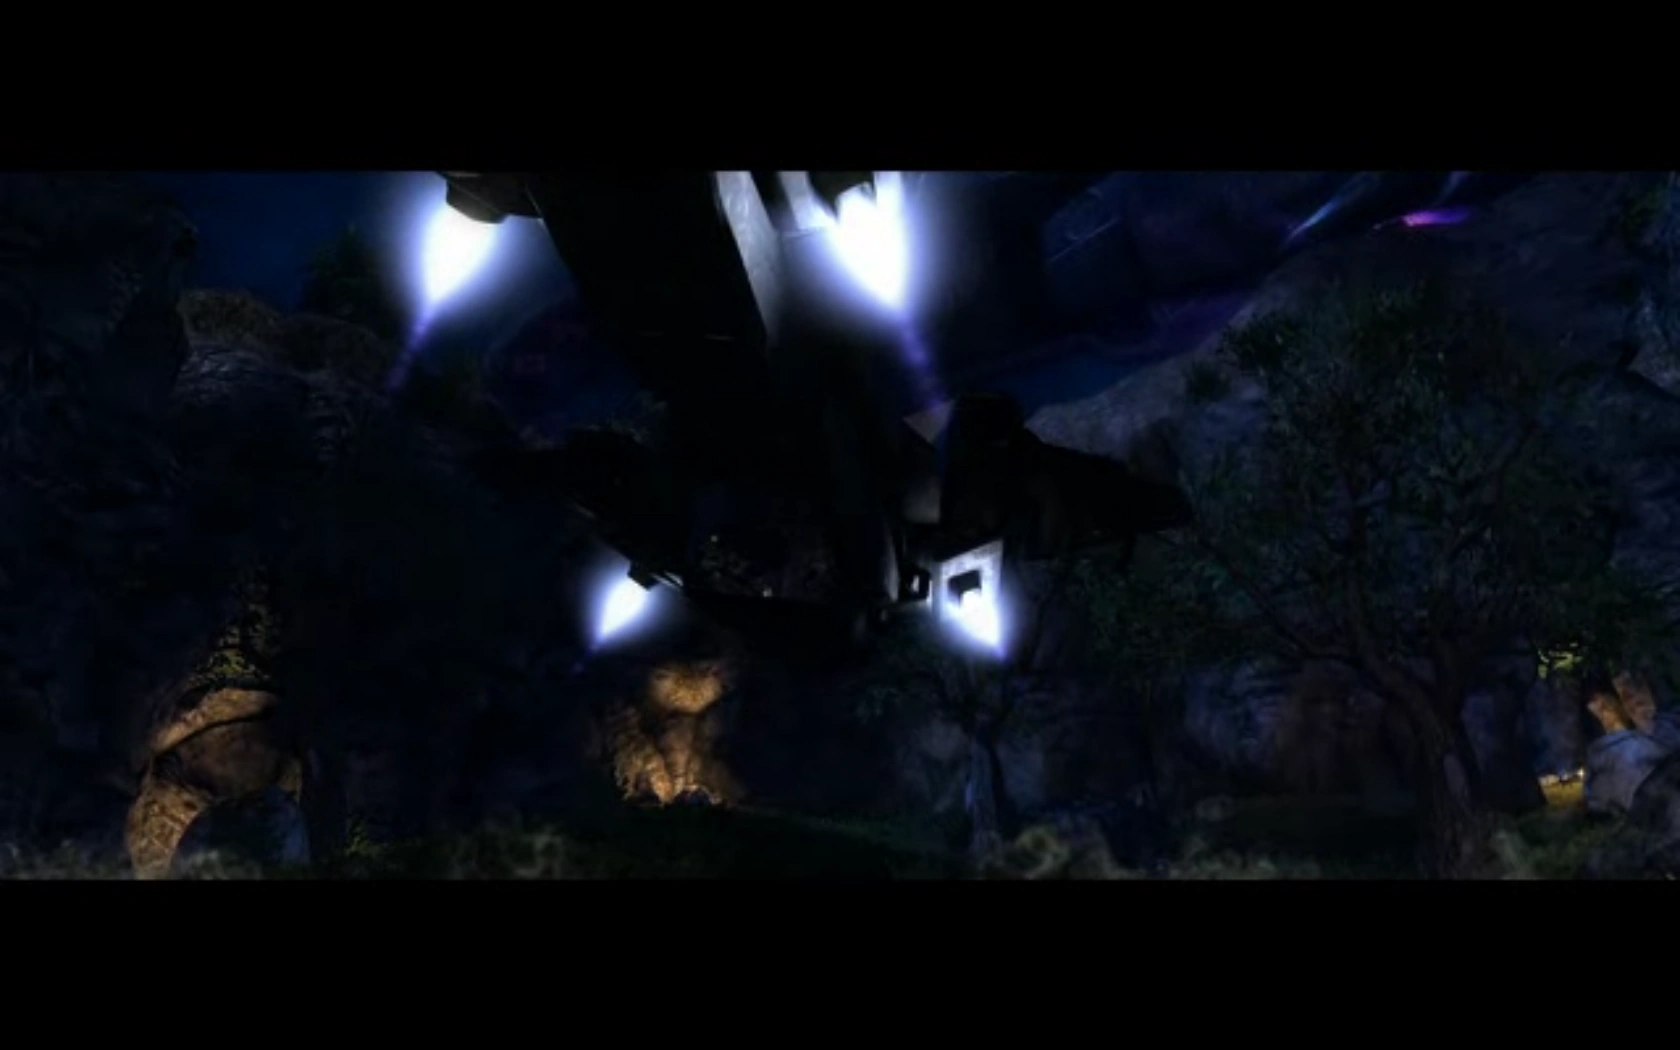
Brilliant Gift approaches the Infinite Succor.
Shortly after the Flood was released, the Covenant Spirit dropship Brilliant Gift attempted to reinforce its allies in the swamps surrounding the containment facility, only to be captured by the Flood. The parasite used it to escape into space, approaching a Covenant agricultural support ship known as the Infinite Succor. The ship's crew ordered it not to land in the hangar to no avail, and the hangar's Unggoy defenders were unable to stop the Flood from advancing further into the ship.
Covenant Counterattack
Word eventually reached Thel 'Vadamee, supreme commander of all Covenant forces on and near Installation 04, that the Succor had been boarded and that the intruders were using human weapons. He immediately assumed that the Demon was involved and sent for SpecOps Commander Rtas 'Vadumee, whom he ordered to lead a boarding operation to retake the ship. After being given his objectives, 'Vadumee set out with a team that included his executive officer Bero 'Kusovai in a Phantom dropship called Glorious Advance to follow through with his mission.
Shortly after entering the ship, the boarders found that the intruders were not humans, but Flood combat forms. This nullified their main objective, which was to eliminate the Demon. However, they still had a chance to fulfill their secondary objective of rescuing the ships legate, the Minister of Etiology. They found him in the security room, the only room that had not been compromised, and then attempted an evacuation of the ship. However, after discovering that the Flood were planning to leave the system, they split up and attempted to handle both of the tasks at hand.
Destruction of the Infinite Succor
Upon arriving at the ship's bridge, 'Vadumee was contacted by the Minister, who informed him that he had joined the Flood because there was no way to stop them, when in actuality he had been assimilated and used to form a Proto-Gravemind. 'Vadumee attempted to finish his task of sending the infested ship into the nearby star Soell, but was interrupted by an infected 'Kusovai. The two then dueled with their energy swords, and 'Vadumee killed 'Kusovai at the cost of his own left mandibles. He then followed through with his plan and escaped the ship two minutes before it made a slipspace jump strait into Soell.
Further Stages
The Library

The Monitor 343 Guilty Spark transported John-117 to the Library of Installation 04, where he was tasked with locating and retrieving the Activation Index. Lead by the Monitor and supported by Sentinels, John proceeded into the bowels of the huge structure, fighting off swarms of Flood. He reached a massive elevator that transported him to the second floor of the facility, and fought the Flood on that floor. Upon reaching the fourth floor, Chief and the Monitor made their way to the Central shaft of the Library and retrieved the Index. The Monitor took possession of the Index and teleported them back to the Control Room.[23][24]
Return to the Control Room

Master Chief, after teleporting back to the Control Room, proceeded to activate Installation 04. However, Cortana, who, after spending twelve hours in the control room, had discovered Halo’s true purpose, and stopped John just in time. After stashing the Activation Index in her memory banks, she told John that Halo will wipe out all life in the galaxy, turning John against the Monitor. Spark ordered his Sentinels to take the Spartan's head, and the AI inside his helmet. After destroying the Sentinels in the Control Room, Cortana told John they would have to destroy Halo to stop the Monitor and the Flood. She determined the best way to do this was to detonate the crashed Pillar of Autumn's fusion reactors. Cortana instructed John to disable three Phase Pulse Generators to buy some time, in case the Monitor found a way to activate Halo without the Index. While Cortana tried to locate the Autumn's crash site, John hijacked a Covenant Banshee and set out to destroy the generators.
Upon the disabling of the third generator, Cortana hacked into the teleportation grid that ran across Halo's surface, and teleported the two to the damaged Covenant cruiser Truth and Reconciliation to rescue Captain Keyes, whose neural implants were required to access the Pillar of Autumn's systems.[25][26]
Ambush
Silva wanted to engage the Covenant in a medium conflict that would "take the hurt to them. Nothing big, not yet anyway, but the kind of pinpricks that still draw blood", leaving Lieutenant McKay to plan out the mission. She used "crashed" Pelicans (Charlie 217's burned-out remains), mock-injured Marines, and a phony distress call as bait in order to draw in the Covenant. Since Wellsley believed that the Covenant took the Marines as a serious force after the raid on the Truth and Reconciliation, Wellsley recommended the monitoring of human radio traffic and regular recon flights, allowing them to easily pick the bait.
First, the preparation of arranging for the bait took several hours (They had to scourge for bodies of comrades killed on the butte for "volunteer" casualties.) Sure enough, thirty minutes into the wait, McKay saw a Banshee and signaled for the operation to commence. Members of the third squad, some of whom had mock-injuries, hurried back to cover as the Banshee shot plasma fire at them. The Banshee then went away, presumably to tell the Covenant about a new Human location.[27]
Later, a Spirit Dropship appeared, dropping Jackals, Elites, Grunts, and a pair of Hunters. McKay quickly ordered all the heavy weapons and sniper fire to concentrate on the "walking tanks". Soon enough, they went down. However, the dropship returned and hosed the entire area, forcing the Helljumpers to take cover.[28] Thus encouraged, the Covenant rushed into the rocks to engage. However, the snipers managed to pick off five alien soldiers before the dropship exacted the position. Two snipers were killed by plasma, and another was wounded.
Soon, the mission turned ugly, as the Covenant engaged in hide-and-seek with the Marines. Just as McKay was about to order a retreat, something even worse appeared.
Suddenly, the bizarre creatures, also known as the Flood, attacked both groups. While the Covenant had experience with the Flood, the Helljumpers simply had never seen them before. Three members of the second squad were going down under the Infection forms, while another was being massacred by the Combat forms. Confused pleas and requests for extraction filled the radio, tripling the radio traffic. McKay received her first look when she noticed a Grunt with two Infection forms; she put down the trio with a sustained burst. However, then, Pvt. Jenkin's Combat form jumped out, hoping to be killed by the Lieutenant. In order to collect a specimen, she sidestepped and restrained the Flood form. To kill the Flood, the Marines and Covenant temporarily joined forces, and eliminated the Flood after 15 minutes. They then proceeded to return to their hide-and-seek. Finally, with half the Marines killed, the UNSC claimed a victory.[29]
Final Actions
- “We did what we had to do... for Earth. An entire Covenant armada obliterated, and the Flood... we had no choice.”— Cortana
Return to the Truth and Reconciliation
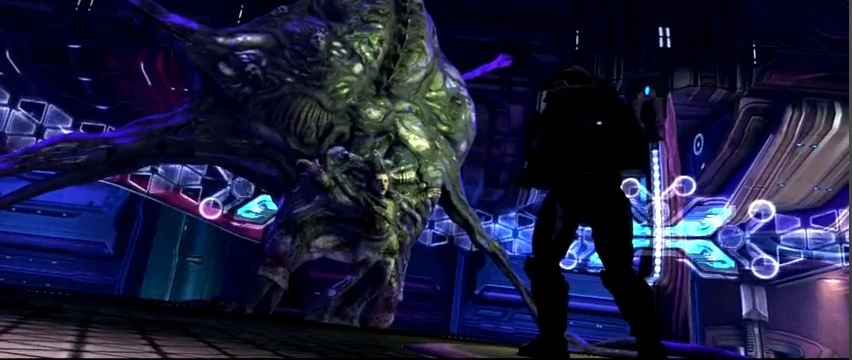
John-117 and Cortana arrived at the Truth and Reconciliation so they could save Keyes and have him activate the Pillar of Autumn's self-destruct sequence. They found themselves in the middle of a battle between the Covenant and the Flood for control of the CCS-class Battlecruiser. They fought through their enemies and entered the ship via the gravity lift after being forced to leave it due to overwhelming Flood forces. They made their way to the bridge where they discovered to their horror that Keyes had become part of a Proto-Gravemind. With no other choice, John-117 punched a hole in the Proto-Gravemind and took Keyes's Command Neural Interface. This would allow them to activate the self-destruct sequence themselves. John-117 and Cortana fought their way to one of the hangars, stole a Banshee and escaped to the Pillar of Autumn.[30][31]
Destruction of the Truth and Reconciliation
By September 22, only 312 humans (236 marines, 76 naval personnel) remained alive at Alpha Base. To escape back to Earth, they attacked the Truth and Reconciliation, which by then was partially secured by the remains of the Covenant Spec Ops team that were sent there, despite the AI Wellsley's warnings. The surviving marines were deployed in the area surrounding the Truth and Reconciliation, which had been restored to working order by that point. The surviving Pelicans landed in the hangar bays, and the Marines took the control room of the ship. Meanwhile, McKay's troops stormed the area surrounding the grav lift, killed the security team guarding it, and entered the ship. Using the schematics from the previous raid, the humans quickly secured the ship's engine room, as well as 80% of the ship. While the human technicians studied the ship's controls, and Wellsley activated the ship's engines, a small group of Flood attacked the engine room. The Flood were quickly subdued, but the attack caused McKay to urge Major Silva to set the ship down and eradicate the Flood on board. Silva, however, believed that intact Flood specimens would gain him an instant promotion back on Earth and refused to listen. Once McKay returned to her post, Lieutenant Commander Gail Purdy pointed out a fiber-optic passage that connected the engines to the command center. McKay, knowing the Flood could not be allowed to reach Earth, severed the passage, and destroyed the ship with all hands, Human and Covenant, as well as any remaining Flood on board.[32]
Destroying the Ring


Having escaped the Truth and Reconciliation, John-117 promptly returned to the Pillar of Autumn, crashing his stolen Banshee into the side of the ship. He then fought the Flood, the Sentinels, and the Covenant and entered the ship's bridge. Once he had dispatched the Covenant Security Team, he uploaded Cortana into the control system. She started the ship's self-destruct sequence, only to discover to her dismay that the Monitor was on board. Guilty Spark began to tap into the ship's systems and data arrays and stopped the self-destruct sequence. Cortana deduced that the Monitor was in the Engineering area of the ship and was trying to take the Autumn's engines offline. Chief decided that instead of a self-destruct sequence, he was going to manually destabilize the engines.
John-117 fought his way through Cryo B to reach Engineering. Following Cortana's instructions, he destroyed each of the four engines by throwing grenades and firing rockets into the open shafts, destabilizing the containment fields. Cortana predicted that they had 15 minutes before the engines detonated. John headed for the shaft of elevator V-1269 where he was ambushed by Zuka 'Zamamee. The trap almost succeeded, but with Cortana's help, John killed Zuka 'Zamamee by knocking the Elite to the bottom of the shaft. John then rode the elevator to a Class Seven Service Corridor located along the ship's dorsal structure. Using a Warthog, he drove along the length of the Corridor to External Access Junction 4C where Echo 419 was to pick up John. However, two Banshees shot down the Pelican, killing Foe Hammer. John was then forced to drive another kilometer to Launch Bay Seven, where a single Longsword fighter was docked. The Spartan successfully boarded the ship and escaped Halo. Moments later, the Autumn's engines detonated, destroying Halo and bringing the battle to an end.[33][34][35]
Aftermath
After the destruction of Installation 04 and John-117's successful escape, Cortana scanned the ring's debris field for survivors. Soon, multiple Covenant capital ships entered the system. Cortana discovered several cryo pods jettisoned from the Pillar of Autumn during the initial battle, one of which contained Linda-058, and a Pelican dropship with several survivors. John-117 picked up the survivors in the Longsword, and with their help, boarded and hijacked the Covenant flagship Ascendant Justice during the Skirmish over Threshold and headed for Reach.
From a strategic standpoint, the Battle of Installation 04 was a major victory for the UNSC. The Covenant lost 5 capital ships (not including those destroyed during the follow up Skirmish over Threshold) and many thousands of ground troops, while the UNSC lost only one ship and perhaps little over a thousand troops. Furthermore, the UNSC gained tactical information on Covenant technology, and more importantly they learned about the Flood and the purpose of the Halo Array.
The battle on Alpha Halo resulted in more than just a UNSC victory, however. It sparked a series of events that would alter the course of the entire war. Thel 'Vadamee, the Supreme Commander of the Fleet of Particular Justice, was stripped of rank and branded as a heretic for his failure to protect Halo. Instead of executing 'Vadamee, however, the Prophet of Truth made him an Arbiter. The Arbiter would play a major role in the events of Halo 2 and Halo 3, as would 343 Guilty Spark, who survived Halo's destruction. Furthermore, outside the galaxy, the Ark started to construct a new Halo to replace the one destroyed in the battle. It was on this replacement Halo that the final battle of the war would take place.
Survivors


It is assumed that only 8 members of the Pillar of Autumn were in space and therefore survived the blast, 6 of which were on a Pelican, two Spartans, Linda, who was in a Cryo pod, and the other one, Master Chief, was on a Longsword fighter.[35][36] Every other person at the battle presumably died when Installation 04 was destroyed. However, since Gunnery Sergeant Marcus Stacker and Private Chips Dubbo, among others, have been seen again in later games, it can be assumed that there were other survivors.[37]
However, it is explained in Halo: The Flood and Halo: First Strike, that the Autumn was operating as a skeleton crew, as the remaining non-essential crew remained in cryo. When the Covenant infiltrated the ship, most of the crew were still asleep and their tubes were shot into space to save them from being killed in the crash.
John managed to retrieve 3 tubes, one containing Linda. The people in the other 2 had died in sleep due to malfunctions. It is not known whether this was a malfunction in one of the cryo storage rooms, or if it happened to almost every tube.
It is unknown how many occupied tubes survived Halo; however, most, if not all, would have been destroyed by the time High Charity arrived.
Participants
Sources
- ↑ Halo Encyclopedia - Page 208 - The Battle of Installation 04
- ↑ Halo: The Flood - Pages 15-24
- ↑ Halo: The Flood 2010 edition - Pages 26-34, 40-42
- ↑ Halo: The Flood 2010 edition - Pages 56-57
- ↑ Halo: The Flood 2010 edition - Pages 34-35, 42-44
- ↑ Halo: The Flood 2010 edition - Pages 44-49
- ↑ Halo: Combat Evolved - Level: The Pillar of Autumn
- ↑ Halo: The Flood 2010 edition - Pages 53-55, 65-67, 71-76, 86-90
- ↑ Halo: The Flood 2010 edition - Pages 62-65, 82-86, 98-100
- ↑ Halo: The Flood 2010 edition - Pages 56-62, 77-82, 90-98
- ↑ Halo: Combat Evolved - Level: Halo
- ↑ Halo: The Flood 2010 edition - Pages 111-120, 123-128, 131-135
- ↑ Halo: Combat Evolved - Level: The Truth and Reconciliation
- ↑ Halo: The Flood 2010 edition - Pages 154-163, 177-189
- ↑ Halo: Combat Evolved - Level: The Silent Cartographer
- ↑ Halo: The Flood 2010 edition - Pages 189-196
- ↑ Halo: The Flood 2010 edition - Pages 141-145, 151-154, 164-177, 206-210, 231-244
- ↑ Halo: The Flood 2010 edition - Pages 199-206, 211-215
- ↑ Halo: Combat Evolved - Level: Assault on the Control Room
- ↑ Halo Encyclopedia - Page 208 - Landing on Installation 04
- ↑ Halo: The Flood 2010 edition - Pages 219-231, 245-251, 253-259
- ↑ Halo: Combat Evolved - Level: 343 Guilty Spark
- ↑ Halo: The Flood 2010 edition - Pages 264-273, 280-282
- ↑ Halo: Combat Evolved - Level: The Library
- ↑ Halo: The Flood 2010 edition - Pages 283-287, 291-300, 308-320
- ↑ Halo: Combat Evolved - Level: Two Betrayals
- ↑ Halo: The Flood, page 246
- ↑ Halo: The Flood, page 248
- ↑ Halo: The Flood 2010 edition - Pages 259-264, 273-280
- ↑ Halo: The Flood 2010 edition - Pages 321-322, 323-328, 338-343
- ↑ Halo: Combat Evolved - Level: Keyes
- ↑ Halo: The Flood 2010 edition - Pages 352-355, 362-364, 367-371
- ↑ Halo: The Flood 2010 edition - Pages 347-352, 357-362, 363-368, 372-381
- ↑ Halo: Combat Evolved - Level: The Maw
- ↑ 35.0 35.1 Halo Encyclopedia - Page 208-209 - The Discovery of the Flood
- ↑ Halo: The First Strike 2010 edition - Pages 53-67
- ↑ Halo: Combat Evolved, End Cutscene