m (clean up) |
mNo edit summary Tag: sourceedit |
||
| (12 intermediate revisions by 8 users not shown) | |||
| Line 1: | Line 1: | ||
| − | {{era| |
+ | {{era|ODST|Multiplayer}} |
| − | |||
{{Multiplayer Map Infobox |
{{Multiplayer Map Infobox |
||
| Line 10: | Line 9: | ||
|hided = true |
|hided = true |
||
|weapons = *[[M41 Surface-to-Surface Rocket Medium Anti-Vehicle/Assault Weapon|Rocket Launcher]] |
|weapons = *[[M41 Surface-to-Surface Rocket Medium Anti-Vehicle/Assault Weapon|Rocket Launcher]] |
||
| − | *[[Sniper Rifle System 99D- |
+ | *[[Sniper Rifle System 99D-Series 2 Anti-Matériel|Sniper Rifle]] |
| − | *[[M7S Caseless Submachine Gun|Suppressed |
+ | *[[M7S Caseless Submachine Gun|Suppressed SMG]] |
*[[M6C/SOCOM|Automag]] |
*[[M6C/SOCOM|Automag]] |
||
*[[M9 High-Explosive Dual-Purpose Grenade|Frag Grenade]] |
*[[M9 High-Explosive Dual-Purpose Grenade|Frag Grenade]] |
||
| Line 22: | Line 21: | ||
}} |
}} |
||
| − | '''Chasm Ten''' is a [[Firefight]] map in ''[[Halo 3: ODST]]''. Based |
+ | '''Chasm Ten''' is a [[Firefight]] map in ''[[Halo 3: ODST]]''. Based on the [[Campaign]] level [[Data Hive]], it is set inside the [[Superintendent]]'s underground data facility. |
== Overview == |
== Overview == |
||
| − | Chasm Ten is a remarkably large map, consisting of two opposing walls, divided by a deep chasm, and connected by a number of bridges. The side on which players spawn starts out with a number of machine gun turrets, as well as a rocket launcher located in some tunnels. The map layout also |
+ | Chasm Ten is a remarkably large map, consisting of two opposing walls, divided by a deep chasm, and connected by a number of bridges. The side on which players spawn starts out with a number of machine gun turrets, as well as a rocket launcher located in some tunnels. The map layout also includes an additional upper level, which can be accessed by air-vents. The upper level also contains machine gun turrets on the player side. Players can expect to be attacked from the front, as well as from the sides. To excel on this map requires a strategic approach. |
In spite of this not technically being a 'night' map, VISR mode can be of great use to players trying to spot enemies in the distance, as well as weapons and ammo. |
In spite of this not technically being a 'night' map, VISR mode can be of great use to players trying to spot enemies in the distance, as well as weapons and ammo. |
||
==Weapons== |
==Weapons== |
||
| − | The side the players start on |
+ | The side the players start on has all of the weapons. Downstairs in the centre are the rockets, on a dispenser on the wall. Directly across the map is the extra ammo (across the bridge) (sniper ammo can be found by looking near the monster closets on the side wall). Upstairs on both sides, there are two snipers. Both upstairs and downstairs, machine gun turrets can be found. The two downstairs levels are slightly exposed from their sides. The upstairs level lacks any form of protection and is vulnerable to grenades. They are however, in prime position for eliminating any hostiles using the two grav-lifts. The spare weapons, grenades and health packs downstairs are inside of the base, allowing you to grab weapons with ease. The weapons and health packs located upstairs are on the outside, exposed to enemy fire. |
==Achievements== |
==Achievements== |
||
| Line 42: | Line 41: | ||
{{Levels}} |
{{Levels}} |
||
| + | [[Category:Halo 3: ODST Multiplayer Maps]] |
||
| + | [[Category:Firefight Maps]] |
||
Revision as of 03:34, 17 March 2015
Chasm Ten is a Firefight map in Halo 3: ODST. Based on the Campaign level Data Hive, it is set inside the Superintendent's underground data facility.
Overview
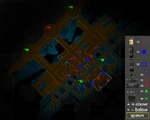
Chasm Ten is a remarkably large map, consisting of two opposing walls, divided by a deep chasm, and connected by a number of bridges. The side on which players spawn starts out with a number of machine gun turrets, as well as a rocket launcher located in some tunnels. The map layout also includes an additional upper level, which can be accessed by air-vents. The upper level also contains machine gun turrets on the player side. Players can expect to be attacked from the front, as well as from the sides. To excel on this map requires a strategic approach.
In spite of this not technically being a 'night' map, VISR mode can be of great use to players trying to spot enemies in the distance, as well as weapons and ammo.
Weapons
The side the players start on has all of the weapons. Downstairs in the centre are the rockets, on a dispenser on the wall. Directly across the map is the extra ammo (across the bridge) (sniper ammo can be found by looking near the monster closets on the side wall). Upstairs on both sides, there are two snipers. Both upstairs and downstairs, machine gun turrets can be found. The two downstairs levels are slightly exposed from their sides. The upstairs level lacks any form of protection and is vulnerable to grenades. They are however, in prime position for eliminating any hostiles using the two grav-lifts. The spare weapons, grenades and health packs downstairs are inside of the base, allowing you to grab weapons with ease. The weapons and health packs located upstairs are on the outside, exposed to enemy fire.
Achievements
Chasm Ten is unlocked by completing the Data Hive mission. An achievement called Chasm Ten can also be unlocked on this map if players manage to score over 200,000 points during a Firefight match.
Gallery


