m (clean up, replaced: Sniper Rifle System 99C-S2 Anti-Matériel → Sniper Rifle System 99C-Series 2 Anti-Matériel (2)) Tag: apiedit |
m (→Trivia) Tag: sourceedit |
||
| (7 intermediate revisions by 6 users not shown) | |||
| Line 18: | Line 18: | ||
*[[Type-1 Antipersonnel grenade|Plasma Grenade]]s |
*[[Type-1 Antipersonnel grenade|Plasma Grenade]]s |
||
|vehicles=None |
|vehicles=None |
||
| − | |power-ups=*[[Active Camo]] |
+ | |power-ups=*[[Active camouflage|Active Camo]] |
*[[Health kit]] |
*[[Health kit]] |
||
*[[Overshield]] |
*[[Overshield]] |
||
| Line 29: | Line 29: | ||
==Summary== |
==Summary== |
||
| − | Hang 'Em High is a medium |
+ | Hang 'Em High is a medium-sized map suited for 4v4 action and is tailored for [[Slayer]] and [[Capture the Flag]], the map is set inside a Forerunner installation on Halo. The map is a simple asymmetrical map with multi-leveled buildings on each side of the map. On the first floor, the map is littered with many small blocks which are referred to as Tombstones, and two small shelter structures on either side of the map, and in the center of the map lies a large trench. The second and third levels contain many ramps and bridges that connect both sides of the map and two structures on the top of each side that in CTF games serve as the base. |
==Strategies== |
==Strategies== |
||
| − | *Hang 'Em High provides an excellent |
+ | *Hang 'Em High provides an excellent map for all sorts of combat scenarios. The [[Sniper Rifle System 99C-Series 2 Anti-Matériel|Sniper Rifle]] and [[M41 Surface-to-Surface Rocket Medium Anti-Vehicle/Assault Weapon|Rocket Launcher]] are located on the exposed catwalks above and are well worth the risk. The [[M90 Close Assault Weapon System|Shotgun]] spawns in the shelters on either side of the map. Players should inspect the areas occasionally for these valuable weapons. During Oddball, it is also recommended to control the areas around the "Shotgun gallery," as there are only two ways in and out. |
| − | *This map |
+ | *This map provides excellent vantage points for players equipped with Sniper Rifles. Take the Sniper Rifle from the platform it spawns on by jumping from the high bridge, return to the top of blue base, or red team's tower base, and begin dispatching any enemy combatants attempting to cross the open spaces, side platforms, or bridges. This strategy makes it difficult for enemies attempting reach either flag. |
| − | *There are two ways onto the middle platform, to |
+ | *There are two ways onto the middle platform, to traverse down without dying. Players must land on the sides of the trench where they can slide down and deflect fall damage away from themselves. Alternatively, players can choose to crouch just before making contact with the ground, which in most cases does not completely deplete shields at all. |
| − | * |
+ | *It is highly discouraged to stay within the trench which divides the map in half; it isn't easy to get out as a small overhang forces you to jump out. Players within the trench are also very exposed to both sides, and are easily prone to enemy fire. |
| − | *Beneath the corner with the tall tower is a long tunnel. This |
+ | *Beneath the corner with the tall tower is a long tunnel. This area can be easily defended in team [[Oddball]] games. Another benefit is that it is situated beneath several spawn locations, where team members can re-spawn if they are killed and take less time to travel long distances in order to provide assistance. |
| − | * |
+ | *Taking cover behind the "Tombstones" and traversing through tunnels helps obscure players from enemy Sniper fire. However, players in these areas should be aware that they may be limited for strategies therefore, close quarters weapons such as Shotguns or Assault Rifles are highly recommended. |
| − | *In |
+ | *In Team Oddball games, have one player run towards where the Active Camo Power-Up spawns and proceed to navigate straight left and up the ramp then left down the little ramp out by where the Needler spawns by default along that ledge, then drop down to the floor and run either left or straight to the Active Camo Power-Up spawn and continue traversing along the same path. The rest of the team should be able to create a distraction for the other team. |
| − | * |
+ | *Utilizing the elevated walkways is also an excellent strategy when bringing back flag to base in CTF game modes, because any thrown grenades tend to either miss or bounce off and it is also difficult to aim at platforms with rocket launcher unless acquiring a better vantage point which overlooks the elevated walkways. |
| − | *Players attempting |
+ | *Players attempting reach for the Sniper Rifle are particularly vulnerable to enemy fire, and may be spotted and dispatched easily by enemy players equipped with the Pistol. There is no other exist points should they come under fire, and choosing to jump off the platform in order to find cover may cause fall damage if players drop from a high level. |
| − | * |
+ | *Combatants can also equip themselves Shotguns and take cover among one of shelters, and proceed to dispatch any enemies with somewhat ease when within effective range. |
| − | *The bunker is good |
+ | *The bunker is also a good vantage point to attack the enemy base. Players there whom are equipped with Plasma or Frag Grenades can effectively cover the center of the map. There are also exits leading to walkways which can be used to traverse towards Red base and attack the Red base spawn points as well. This tactic works especially well with infinite grenades turned "on." |
| − | * |
+ | *Red team members can also choose to traverse towards the bunker and stay in the corner right underneath the walkway leading up and down to their base and can proceed to dispatch anyone who goes that way. |
==Trivia== |
==Trivia== |
||
*Hang 'Em High is a reference to the Western Film [[wikipedia:Hang 'Em High|''Hang 'Em High'' (1968)]], starring [[wikipedia:Clint Eastwood|Clint Eastwood]]. |
*Hang 'Em High is a reference to the Western Film [[wikipedia:Hang 'Em High|''Hang 'Em High'' (1968)]], starring [[wikipedia:Clint Eastwood|Clint Eastwood]]. |
||
| − | *In Season 2 and Season 6 of ''[[Red vs |
+ | *In Season 2 and Season 6 of ''[[Red vs Blue]]'', Hang 'Em High was used as a metaphor of Caboose's Mind. |
*''Hang 'Em High'' was remade into the map [[Tombstone]], for the [[Xbox]] version of ''[[Halo 2]]''. |
*''Hang 'Em High'' was remade into the map [[Tombstone]], for the [[Xbox]] version of ''[[Halo 2]]''. |
||
*The Mythic map Longshore was influenced by Hang 'Em High. |
*The Mythic map Longshore was influenced by Hang 'Em High. |
||
*''Hang 'Em High'' bears some resemblance to the level, ''What About BOB?'', from Marathon 2: Durandal. |
*''Hang 'Em High'' bears some resemblance to the level, ''What About BOB?'', from Marathon 2: Durandal. |
||
*''Hang 'Em High'' was remade for ''Halo: Combat Evolved Anniversary'' and ''[[Halo: Reach]]''{{'}}s Team Classic playlist as [[High Noon]]. |
*''Hang 'Em High'' was remade for ''Halo: Combat Evolved Anniversary'' and ''[[Halo: Reach]]''{{'}}s Team Classic playlist as [[High Noon]]. |
||
| + | *The shadow of the [[MA5B Individual Combat Weapon System|assault rifle]] can be seen below the bridges on the first level; the assault rifle can also be picked up from underneath the bridge. |
||
| + | *''Hang 'Em High'' was remade in ''[[Halo 5: Guardians]]''{{'}} [[Forge]] and appears in the [[Super Fiesta]] playlist alongside a handful of other ''Halo: Combat Evolved'' remakes. |
||
==Gallery== |
==Gallery== |
||
| Line 58: | Line 60: | ||
File:Hang_Em_High.png|The remake of "Hang 'Em High" as it appears in the debut trailer for ''Halo: Combat Evolved Anniversary''. |
File:Hang_Em_High.png|The remake of "Hang 'Em High" as it appears in the debut trailer for ''Halo: Combat Evolved Anniversary''. |
||
heh01.jpg|3D Render of Hang 'Em High. |
heh01.jpg|3D Render of Hang 'Em High. |
||
| + | HCE Multiplayer MA5BShadow.png|The shadow of the assault rifle seen underneath the bridge. |
||
</gallery> |
</gallery> |
||
Revision as of 02:36, 13 June 2017
Tombstones for Everybody.
|
Hang 'Em High is a multiplayer map in Halo: Combat Evolved. It is set inside a Forerunner facility on Halo. It was remade as Tombstone in Halo 2. Some parts of the Halo 3 map Longshore were influenced by Hang 'Em High, and it reappeared as High Noon in Halo: Combat Evolved Anniversary.
Summary
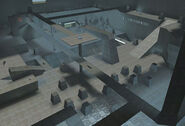
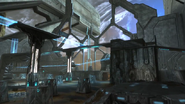
Hang 'Em High is a medium-sized map suited for 4v4 action and is tailored for Slayer and Capture the Flag, the map is set inside a Forerunner installation on Halo. The map is a simple asymmetrical map with multi-leveled buildings on each side of the map. On the first floor, the map is littered with many small blocks which are referred to as Tombstones, and two small shelter structures on either side of the map, and in the center of the map lies a large trench. The second and third levels contain many ramps and bridges that connect both sides of the map and two structures on the top of each side that in CTF games serve as the base.
Strategies
- Hang 'Em High provides an excellent map for all sorts of combat scenarios. The Sniper Rifle and Rocket Launcher are located on the exposed catwalks above and are well worth the risk. The Shotgun spawns in the shelters on either side of the map. Players should inspect the areas occasionally for these valuable weapons. During Oddball, it is also recommended to control the areas around the "Shotgun gallery," as there are only two ways in and out.
- This map provides excellent vantage points for players equipped with Sniper Rifles. Take the Sniper Rifle from the platform it spawns on by jumping from the high bridge, return to the top of blue base, or red team's tower base, and begin dispatching any enemy combatants attempting to cross the open spaces, side platforms, or bridges. This strategy makes it difficult for enemies attempting reach either flag.
- There are two ways onto the middle platform, to traverse down without dying. Players must land on the sides of the trench where they can slide down and deflect fall damage away from themselves. Alternatively, players can choose to crouch just before making contact with the ground, which in most cases does not completely deplete shields at all.
- It is highly discouraged to stay within the trench which divides the map in half; it isn't easy to get out as a small overhang forces you to jump out. Players within the trench are also very exposed to both sides, and are easily prone to enemy fire.
- Beneath the corner with the tall tower is a long tunnel. This area can be easily defended in team Oddball games. Another benefit is that it is situated beneath several spawn locations, where team members can re-spawn if they are killed and take less time to travel long distances in order to provide assistance.
- Taking cover behind the "Tombstones" and traversing through tunnels helps obscure players from enemy Sniper fire. However, players in these areas should be aware that they may be limited for strategies therefore, close quarters weapons such as Shotguns or Assault Rifles are highly recommended.
- In Team Oddball games, have one player run towards where the Active Camo Power-Up spawns and proceed to navigate straight left and up the ramp then left down the little ramp out by where the Needler spawns by default along that ledge, then drop down to the floor and run either left or straight to the Active Camo Power-Up spawn and continue traversing along the same path. The rest of the team should be able to create a distraction for the other team.
- Utilizing the elevated walkways is also an excellent strategy when bringing back flag to base in CTF game modes, because any thrown grenades tend to either miss or bounce off and it is also difficult to aim at platforms with rocket launcher unless acquiring a better vantage point which overlooks the elevated walkways.
- Players attempting reach for the Sniper Rifle are particularly vulnerable to enemy fire, and may be spotted and dispatched easily by enemy players equipped with the Pistol. There is no other exist points should they come under fire, and choosing to jump off the platform in order to find cover may cause fall damage if players drop from a high level.
- Combatants can also equip themselves Shotguns and take cover among one of shelters, and proceed to dispatch any enemies with somewhat ease when within effective range.
- The bunker is also a good vantage point to attack the enemy base. Players there whom are equipped with Plasma or Frag Grenades can effectively cover the center of the map. There are also exits leading to walkways which can be used to traverse towards Red base and attack the Red base spawn points as well. This tactic works especially well with infinite grenades turned "on."
- Red team members can also choose to traverse towards the bunker and stay in the corner right underneath the walkway leading up and down to their base and can proceed to dispatch anyone who goes that way.
Trivia
- Hang 'Em High is a reference to the Western Film Hang 'Em High (1968), starring Clint Eastwood.
- In Season 2 and Season 6 of Red vs Blue, Hang 'Em High was used as a metaphor of Caboose's Mind.
- Hang 'Em High was remade into the map Tombstone, for the Xbox version of Halo 2.
- The Mythic map Longshore was influenced by Hang 'Em High.
- Hang 'Em High bears some resemblance to the level, What About BOB?, from Marathon 2: Durandal.
- Hang 'Em High was remade for Halo: Combat Evolved Anniversary and Halo: Reach's Team Classic playlist as High Noon.
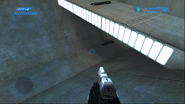
- The shadow of the assault rifle can be seen below the bridges on the first level; the assault rifle can also be picked up from underneath the bridge.
- Hang 'Em High was remade in Halo 5: Guardians' Forge and appears in the Super Fiesta playlist alongside a handful of other Halo: Combat Evolved remakes.
Gallery
Videos


